Tuesday, May 1, 2012

Morel Mushroom Score


Springtime isn't normally the time that I think much about wild mushroom foraging.  Though I've gathered Verpa Bohemica,  or what's known as false morels, the fact that Verpas aren't the "real deal" (though I've eaten them without incident) is fairly recent news to me.  Last Spring, through various internet sources I learned that Verpas,  which can be found a-plenty amongst cottonwoods along river banks around mid-late March, are not true morels.  Since then, my Spring mushrooming hopes had been dashed.....until this past Saturday. 

The lovelies pictured above are true morels.  While out at my brother's property, working on the garden, Todd discovered these growing on the verges of a big pile of bark mulch which he had delivered last year.  More brown/black than Verpas and with the biggest indicator, that being the stem and cap completely attached (verpa caps sit on top of the stem like a cup), these were clearly of the Morchella genus.  The spore obviously came in with the bark mulch.  So now, fingers crossed, they will continue to sprout in that spot and perhaps even in the other places around Todd's property where some of the mulch was spread.  I had heard that they can be found on Sauvie Island in May, but I still think they are rather hard to find if you pointedly go out foraging for them.  Definitely harder than the other mushrooms I've 
hunted.


The unexpected harvest, along with the usual-- fennel and purple broccoli.


I harvested about half a pound of morels from around the mulch and made a shallot and cream based sauce served over pasta for dinner last night.  SO GOOD.  My new favorite I think, next to lobster mushrooms.


The biggest one.
I love it's "gnome-like" personality.

Tuesday, April 3, 2012

Making Butter from Raw Jersey Cream


This morning I drove and hour through the rain to get to Kookoolan Farms in Yamhill to purchase four half gallons of fresh, raw Jersey milk for the purpose of making butter.

For what would seem like unfamiliar territory, butter making is actually not.  I grew up drinking raw milk from my grandparents Guernsey cow and eating butter made from the cream.  Though my grandmother had an electric butter churn, my mom still occasionally gave my brothers and I the task of making butter in a large mayonaise jar.  We would take turns shaking the jar, usually while watching cartoons after school.

Homemade butter, made from raw milk of pastured cows, to me is a very rare and precious thing in today's world.  Though it may look the same and perhaps taste similar to expensive butters like Kerry Gold, it is definitely a world apart from butter made from milk from conventionally run dairies.  Pasteurization, homogenization, additives....not to mention what the cows were fed--to me, factory farm milk is so far away from what nature intended milk to be that it's really not milk anymore.  But, I digress.  A raw milk blog entry needs to be a thing of it's own for another time.  On to butter making......


Step 1:
Look for the cream line.  This is what you want for butter.


Step 2:

Ladle of cream with a sterilized ladle into a sterilized jar.
I used a two quart canning jar.  Lid and ring sterilized as well.
Leave about a 1/2 or so of cream on top of the milk.  It will help it keep longer.

Let the cream come to room temperature.  Or, if you're in a hurry like I was, shake it for a few minutes under a stream of warm tap water to bring the temp up if it is still cold.


Ready to shake


Step 4:

Shake it. Back and forth.  Side to side.  Use both arms...or one arm.  Switch arms when you get tired.
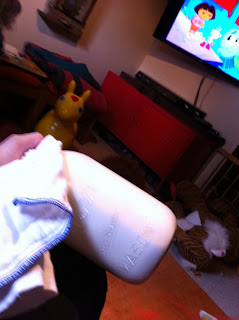
Think about how toned your arms would look if you did this everyday.  The entire process should take about as long as an episode of "Dora The Explorer".  


After about 10 minutes or so curds of butter will start to form.  Though I did not take a picture of it, early on, very small, random white dots will start to stick to the inside of the jar.  That is the beginning of the butter.


Finished.


Step 5:

Drain off liquid and remove butter to a clean bowl.  


Step 6:  

Rinse the butter in the bowl under a gentle stream of COLD tap water.  The object here is to get to a point where there isn't hardly any milkiness to the water coming from the butter.  It should be nearly clear.  I did this by gently squishing and folding the butter.


Step 7:

Squeeze remaining water from butter.

(note the look of amazement from the scrubby holder frog)


At this point you can either salt the butter (which I did) or leave unsalted.  I believe it lasts a bit longer salted.  

That's it.  It will keep in the fridge a few days.  I froze about 1/3 of the batch, which yielded about 1 1/4 cups of butter from about a quart of cream.  

It tasted great!  I added just a tad too much salt, but it had that grassy, warm, complex flavor only found in pastured butter along with that extra special subtle flavor that only comes from raw milk.  A taste from my childhood.

I can't wait until later this Spring when the cows get more fresh grass.  The butter will then change from pale yellow to bright gold!

Up next, I am also at the moment culturing a cup of cream with piima starter for cultured butter and yogurt.  

Tuesday, March 27, 2012

Soil Block Update


Happy little three-week-old tomato starts,
growing away in their soil blocks.

It's been a month now since starting seeds in the soil blocks.  First with the brassica crops and then with the tomatoes, peppers, tomatillos and eggplants that followed a few weeks later.

So, I have to say that they work pretty well with a few minor flaws that required a bit of special treatment.  First and foremost, DON"T LET THE BLOCKS DRY OUT.  Otherwise you will end up with, not blocks, but dry little "bricks" of soil that water will run right off of.  Also, and related to the above, don't pack your blocks too tight.  Next time I think I will block the soil a little less firm.  The advantages of this (I hope) will be that they not only will accept water more readily but also  be easier for seeds to germinate and push up through.  In addition, next time I will also screen out the larger pieces of pumice in the soil mix.  Any piece of pumice, say, over 1/8" will create a major barrier, especially for small seeds, that will be very difficult for a seed to push around as they germinate.

Things I have so far appreciated about soil block, aside from not having to use pots or coco pellets, is that the soil mix actually has some nutrition for the seedlings.  "Coco peat" pellets, so far as I can tell, don't have much to offer in the way of fertilizer.  Also, even though the blocks have a tendency to dry out, at least you can pick up one and see all the surfaces (not just the top) thus it's easier to determine if it really needs water or not.  Last year, with the cow pot experiment, I would sometimes find the inside bone dry when I went to transplant.

Next year I might invest in a 4" blocker.  Woo hoo!


Roots emerge.  Almost ready for up-potting.


Thursday, March 1, 2012

Soil Blocker......starting seeds without pots


Tronchuda cabbage, newly sprouted


So it's time once again to start brassica crops indoors.  Last year I experimented with making my own "cow pots".  Though initially the cow pots worked out quite well, I eventually found them to be problematic in that they seemed to draw too much moisture from the soil and also constricted root growth too much once the plants were mature.  So, this year I invested in a soil blocker.  It was a little spendy, around $30 from Johnny's Select Seeds.  This was the lowest price I could find.  I didn't manage to find anyone who sold them in Portland.

Below is a photo doc of my first go at making soil blocks.  


My helpers.


First step--mixing the soil.  This involved a trip to Concentrates, in Milwaukie.  Ingredients, from most to least included coco peat fiber, pumice, garden soil, compost, blood meal, dolomite, azomite, greensand and bone meal.  I got the recipe from pottingblocks.com.

After mixing is complete, you make a slurry and then start blocking.


Eqipment:  Bowl of water for rinsing blocker.  Tray for blocks pan of wet soil and an old cloth diaper for cleaning hands before handling the camera!


dip in blocker


Making a what I call a "dirt angel", by twisting blocker back and forth.  


Note that the soil in this pic is not as wet as the first.  This pic was taken on second attempt and drier soil, in my opinion, works better.  You lift and repeat your dirt angel, lifting and pressing in more soil,  about 3-4 times until water starts to ooze from top of blocker.  The trickiest part here is lifting the blocker up without the blocks slipping out.  This is why you don't want the soil too wet, as they won't stay in the molds.  I found that gently tilting the blocker and lifting just enough to "step" onto the next area of soil works best.  Also, patting down a smooth area before each pass is helpful.


Positioning.  About 1/8" spacing..... 


ta da !


Finished tray.


So you can see that there are nifty little built in holes for your seeds.  I think some folks just drop in the seed but I covered mine with a bit of fine soil.  Another useful tip is to use a finer grit of pumice or pearlite than is suggested on the website.  I found that for brassica seeds (cabbage, broccoli, kale, etc.), if they have a large pumice piece sitting on top of them then it will be difficult for them to sprout.  Next time I will sieve out the large pieces.

So there it is.  Soil blocks.  So far, so good and it's great to have eliminated yet another plastic (pots) item from my gardening.


Sunday, February 26, 2012

Porchetta di Testa....what to do with a pig head


Pig skull. This one from two years ago,
 rests peacefully in the garden.


This is a documentation of my third time making Porchetta di Testa, back in December.  If you should stumble upon this entry, you probably already know what it is.  But for those uninitiated it is an Italian, sort of "pig head roulade", that, through a long process of deboning, seasoning, rolling, tying and poaching becomes a delicious bit of charcuterie.

The finished Porchetta
sliced open on Christmas day '11

Here, in photos, is how Porchetta di Testa is done.  For more detailed instruction and also to give credit, you can learn from charcuterie expert, Chris Constantino, here.

You start, of course, with the head in it's minimally processed state.  This one, as with the other two from past years, came from the half or whole hogs we have purchased from Deck Family Farm.  They raise wonderful, pastured pork on their farm near Eugene, Oregon.

Deboning a pig head is kind of tricky, not to mention a very sobering experience that really, for me, brings home the reality of meat eating--in where it comes from, that it was a life....this is a long, long way from opening a plastic wrapped pork chop from Safeway.
Once you do the deboning it is much easier the second go.  Please be warned that the next few images are rather graphic and disturbing to some.

 Fully deboned, "pig mask"
flesh side and.....

Skin side


Next you take your "mask" and, along with the tongue that you also remove, you season liberally with salt, rosemary, pepper, garlic, paprika (not original to the recipe) and lemon zest (next time I'm omitting the lemon zest--I don't care for it).  It then rests in the fridge for a day.

Below are the next steps.  The head is rolled up with the tongue tucked, meaty end inside the snout.  Then tied (this time I used meat netting).  


The next step, cooking,  is where I took the greatest departure from Chris Constantino's method.  First of all, he cryovacs his porchetta in plastic.  I really don't like cooking in plastic.  He then just barely cooks the porchetta in a sous vide.  I don't own a sous vide and cooking something at a really low temp bothers me.  So, after rummaging through all my heat proof bowls I found a pyrex and a Heath Pottery bowl that was just the right size to cram the porchetta tightly into.  then I sealed the edges with lard and put it inside another piece of elasticized netting to hold it all together.  Then, into my "sous vide" (slow cooker) in as much water as it will hold for about 12 hours on high, which, ends up being a little over 200 degrees.


After 12 hours you just take it out of it's bath and lest it rest again in the fridge for about 2-3 days.


The finished porchetta.  Note all the gelatin.


Porchetta interior.  The white lines are ear.  Wrapped between the ears you can see a section of tongue.  all around is marbling of fat and meat with little bits of gelatin pockets.


Served, sliced thin with capers, radish, young mustard greens and grainy mustard.

I almost forgot.  You can take the skull, make a mirepoix (carrots, celery, onion) and then roast it for about an hour.  I always cover they eye with a slice of lemon--seems more dignified.  Put all of it in a stock pot with water to cover and maybe some white wine and cook for several hours.  You end up with about 3-4 quarts of really great stock to use at a later time.


So there it is.  Porchetta di testa.  It's a lot of work, yes, but I find satisfaction in making this in different ways.  There is a relation to family culinary roots.  My maternal grandparents, of Swiss descent,  butchered and used most of the parts of the hogs they used to raise (I have memories of grandma making head cheese).  There is also, related to the above, a thriftiness to it in that you are utilizing a part that every day in this country is usually thrown away.  Finally, there is what I touched on earlier, it's  kind of like a "meat epiphany", where you really start to understand what it is to eat meat.